| WEBINAR Sep 25 Wed 2PM PST | Criteria and Metrics for LLM Evaluation
Try Out Simple Image Classification(at home!!)

Try Out Simple Image Classification(at home!!)

🔑 In 9 minutes you will learn:


  • The definition and process of image classification
  • The definition and usage of MNIST dataset
  • Ways to improve accuracy of image classification

Image classification, in general, is the process of finding patterns in images based on contextual information contained within the images. Based on that information or features, the model learns to recognize what an image represents in general. One such example is of Handwritten Digit Recognition. Most of the time, it is relatively easy for a human being to understand what someone else has written, but the same does not hold for a machine. A machine needs to ‘learn’ what information is contained in an image of a handwritten text so that it can later identify that text. This identification in images is made based on the pixel values. For handwritten digit classification, the first significant source of data that comes to mind is the MNIST dataset, as it is the most popular dataset for this domain. So without further ado, let’s learn how to implement handwritten digit classification and also discover ways in which the accuracy of the classification can be improved!

About MNIST dataset

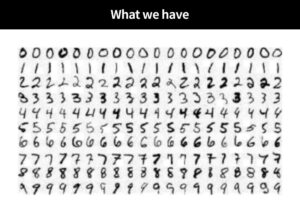
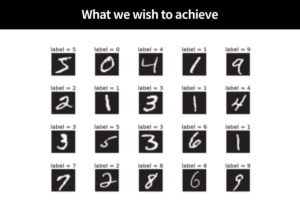
Modified National Institute of Standards and Technology, known as MNIST in short, is a dataset containing handwritten images of digits from 0 to 9 (made by the guru, Professor Yann LeCun, and his colleagues). To be more precise, the dataset contains a total of 70,000 square, grayscale images of dimensions 28 x 28 pixels each. Each image comprises 784 features, and each feature corresponds to a pixel’s intensity, which is from 0 to 255. Out of the total 70,000 images in the dataset, 60,000 are for training, and the remaining 10,000 images are for testing. The total number of classes is 10, signifying the output i.e., the digits from 0 to 9 inclusive.

THE MNIST database of handwritten digits

Prerequisites

Before you move ahead with this tutorial, you need to have basic programming knowledge in any language, preferably in Python 3, as well as some understanding of Machine Learning and Deep Learning concepts. Our code will be using Google Colab, but you can work on any code editor of your choice. We will be using Keras.

Python Code for Handwritten Digit Classification

Step 1: Import essential libraries and packages


import tensorflow
import tensorflow.keras
from keras import models
from keras import layers
from keras.utils import normalize
from keras.utils import to_categorical
import matplotlib.pyplot as plt
Step 2: Load the MNIST dataset


Since the MNIST dataset is hugely popular, it can easily be easily accessed from different sources. Even TensorFlow and Keras allow us to download it through their respective API directly. Thus, we will download it through Keras’ API.


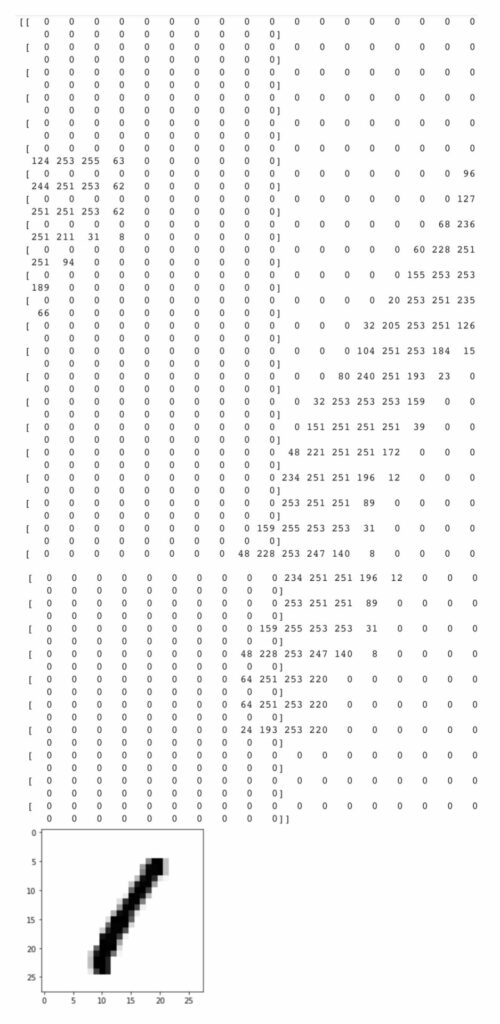
mnist_dataset = tensorflow.keras.datasets.mnist
# Split the data into training and test sets.
(train_X, train_Y), (test_X, test_Y) = mnist_dataset.load_data()
# train_X represents the pixel values (feautures) of the 28 x 28 image.
print(train_X[3])
plt.imshow(train_X[3],cmap=plt.cm.binary)
plt.show()


Output:


Step 3: Build the Model


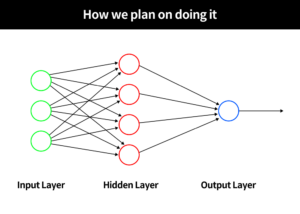
We have decided to go for a 4-layered model i.e., having two hidden layers and an input and output layer. The rectifier activation function is chosen for the neurons in the hidden layers.


# 4-layered model
model = models.Sequential()
# Hidden layer containing 512 units. Rectifier linear function is used as the activation function. 
model.add(layers.Dense(512, activation='relu', input_shape=(28 * 28, )))
model.add(layers.Dense(128, activation=tensorflow.nn.relu))
# Dropout is a regularization technique that is used to reduce overfitting.
model.add(layers.Dropout(0.2))
# Output layer which is 10-way softmax layer, which returns an array of 10 probability scores displaying the probabability of image of the digit belonging to which of the 10 classes.
model.add(layers.Dense(10, activation='softmax'))
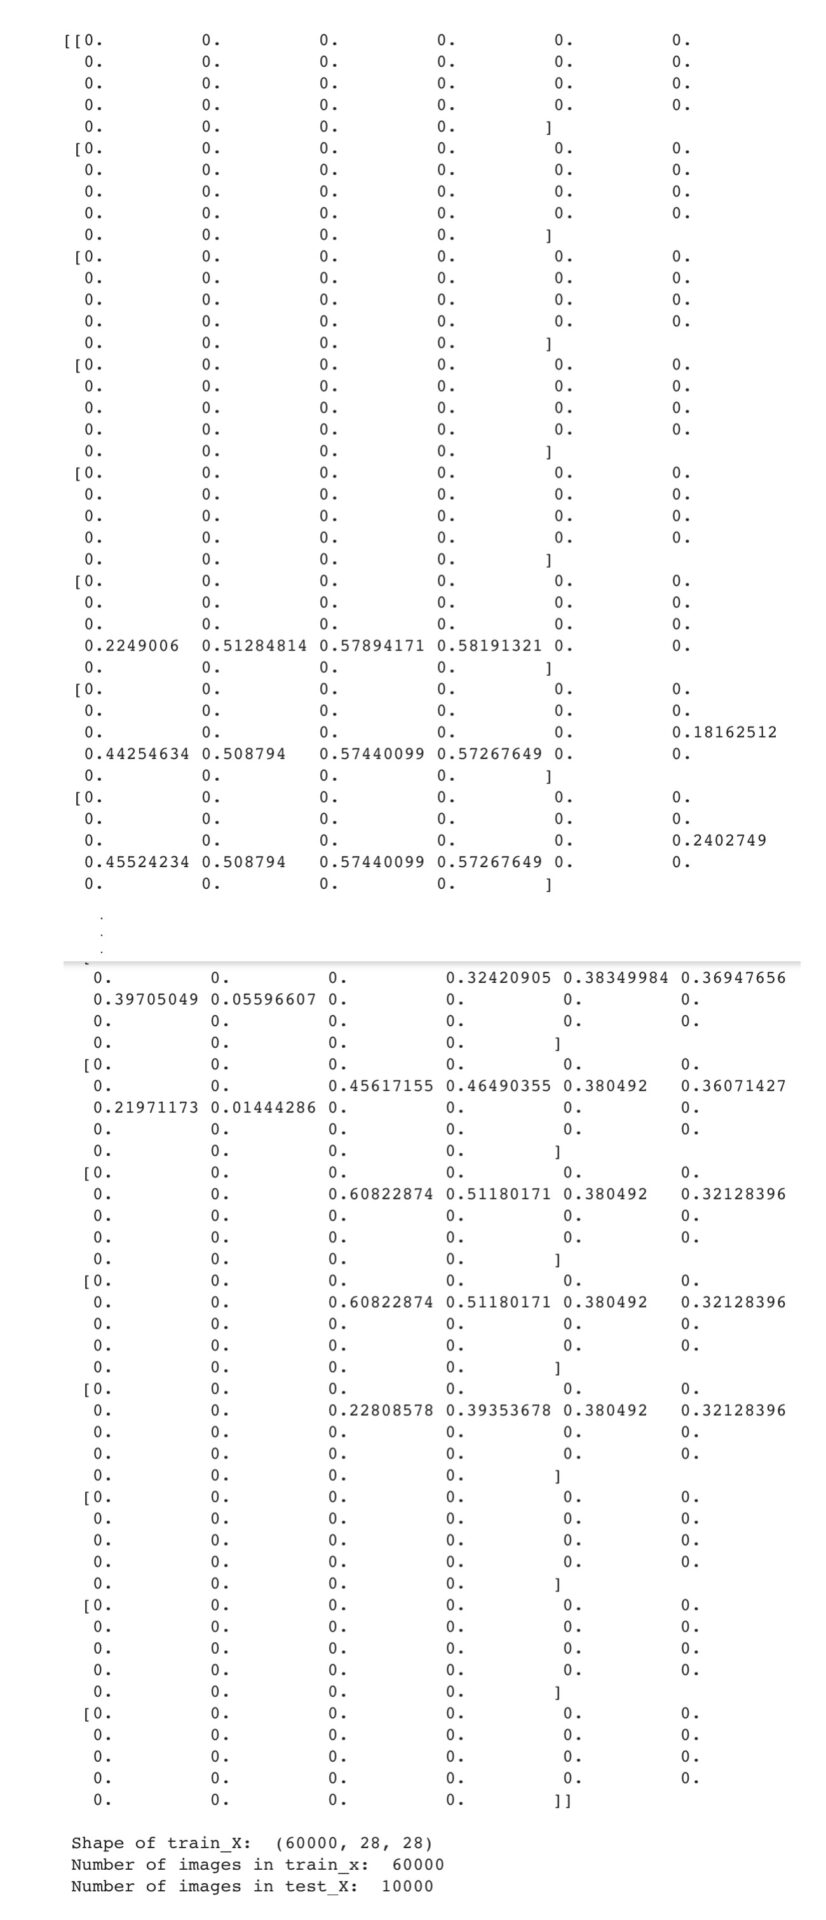
Step 4: Normalize the data i.e., change the current data range from 0 to 255 to 0 and 1 inclusive.


It is considered a good practice to scale input values when it comes to neural networks. Thus we will normalize our data.


train_X = normalize(train_X, axis=1)
test_X = normalize(test_X, axis=1)
print(train_X[3])
print(" ")
print('Shape of train_X: ', train_X.shape)
print('Number of images in train_x: ', train_X.shape[0])
print('Number of images in test_X: ', test_X.shape[0])


Output:


Step 5: Flatten each 28 x 28 image to 1 x 784 image


The training dataset is structured to be a 3-dimensional array. To be able to use the dataset in Keras API, we need 4-dimensional NumPy arrays. Therefore, we need to flatten or reduce the images so that they represent a vector of pixels. In this case, since the image is 28 x 28, there will be 784-pixel values.


train_X = train_X.reshape(train_X.shape[0], -1)
test_X= test_X.reshape(test_X.shape[0], -1)
# Encode labels
train_Y = to_categorical(train_Y)
test_Y  = to_categorical(test_Y)
print('Shape of train_X: ', train_X.shape)
print('Number of images in train_x: ', train_X.shape[0])
print('Number of images in test_X: ', test_X.shape[0])


Output:


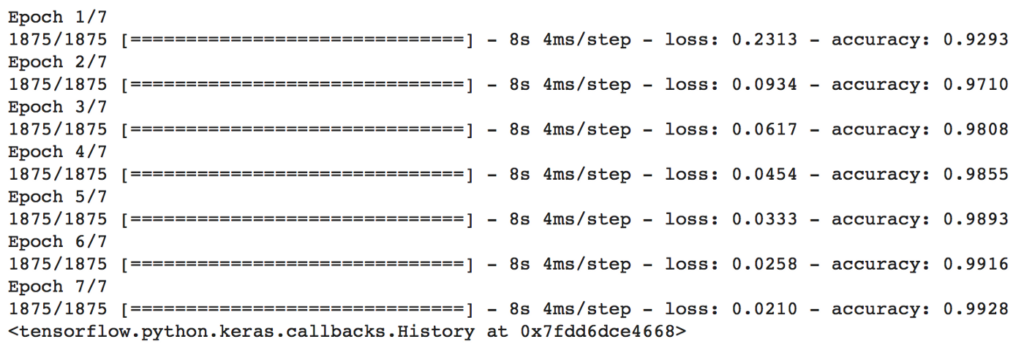
Step 6: Train the model


We will now fit the model.


model.fit(train_X, train_Y, epochs=7)


Output:


Step 7: Evaluate the model accuracy on test data


We will now evaluate the accuracy of the model.

_, test_accuracy = model.evaluate(test_X, test_Y, verbose=0)
print(f"\nTest Accuracy : {test_accuracy * 100} %")


Output:


97.85% seems quite great? Isn’t it? No, never satisfy! In the next section, we will discuss how to improve it even more!

Improving Accuracy of Image Classification with MNIST

We say that the accuracy of our model is 97.85%. The question that arises is, can we still improve the accuracy? The answer, yes, we can! We can improve the accuracy of the image classification by altering our model as well as our dataset. For a start, we can increase the number of layers in our neural network. The added layers can enable a neural network to learn a more complex classification function that can possibly improve classification performance and accuracy. Changing and trying out different kernel sizes and activation functions can also lead to better results.
Where the dataset itself is concerned, we can firstly expand our dataset, and this is the easiest solution. The sizes of images in the dataset can also tamper with i.e., increasing or decreasing their sizes according to need. Another fundamental way in which the image classification accuracy can significantly increase is by Data Augmentation. This is basically the practice of adding synthetic data to your dataset by flipping images, adding noise and other distortions, etc. One way is that we can shift each image by one pixel in all of the 4 directions (left, right, up, down) i.e. by [-1,0], [1,0], [0,1], [0, -1] respectively. We can also shift the images diagonally and include these shifted images in the dataset. In this way, not only will we have more data, but also more variation in that data, which can help to boost the accuracy of classification.

Having various types of datasets like MNIST can be helpful for your personal studying, especially under current lock-down environment. However, datasets like MNIST is challenging to compose and are not accessible easily; because it is challenging not only to gather, but also to have it pre-processed just for your specific needs.

DATUMO has been working with big firms to establish such open datasets, like KorQuAD sets (The Korean Question Answering Dataset). Here, we crowdsource our tasks to diverse users located globally to ensure the quality and quantity on time. Moreover, our in-house managers double-check the quality of the collected or processed data. Let it be your professional dataset or academic dataset!

Just focus on your works. DATUMO got your back!

To sum it all up, we started off by discussing what image classification in general is and how it is carried out by a model i.e., based on the pixel values in an image. We also talked about the very popular MNIST dataset, which is basically a dataset of handwritten digits and is used commonly in the handwritten digit classification problem. We thoroughly discussed the details and particulars of this dataset and went through each step of handwritten digit classification in Python. Lastly, we talked about how we can improve the test accuracy by introducing some changes in the model as well as in the dataset, for example, by creating an augmented dataset.

See what we can do for you.

Build smarter AI with us.

We would like to support the AI industry by sharing.

Related Posts